Imagine celebrating a birthday with a cake that combines the best of both worlds: soft, moist cake and luscious ice cream. This Birthday Ice Cream Cake has been a cherished recipe in my family for years, perfect for surprising someone special on their big day. The blend of cake and creamy ice cream creates a festive treat that everyone, from kids to adults, adores. With minimal ingredients and a straightforward process, you can whip this up quickly, ensuring a show-stopping dessert that will gather glowing reviews and happy faces.
Why Cook This at Home
There are countless reasons to whip up this delightful Birthday Ice Cream Cake! First and foremost, it’s an incredibly easy recipe that doesn’t break the bank. With just a box of cake mix and a quart of ice cream, you’ll create a dessert that looks and tastes gourmet. It’s ideal for birthdays, of course, but also works wonderfully for any celebration or a simple family get-together. This cake offers the perfect combination of textures, with the sponge cake breaking up the cool creaminess of the ice cream, creating a symphony of flavors.
"This Birthday Ice Cream Cake was the highlight of my child’s birthday party! Everyone loved it, and it was so easy to make!" – A Happy Baker
The Cooking Process Explained
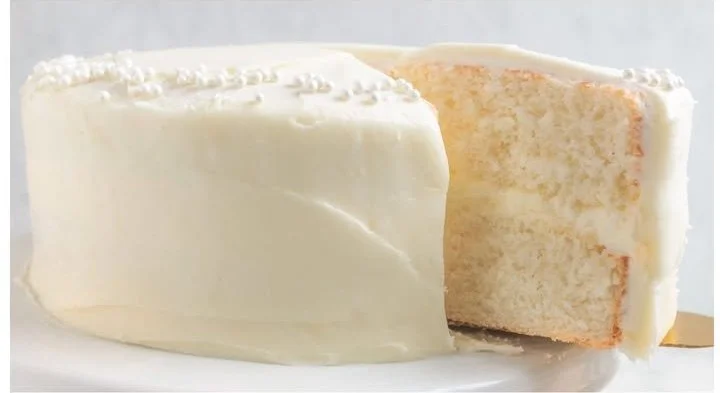
Making Birthday Ice Cream Cake is a breeze, and the steps are straightforward. First, you’ll prepare your cake batter and bake your layers. Once cooled, the real magic happens when you layer the cake with a generous scoop of ice cream. This no-fuss recipe ensures that anyone, even those who are new to baking, can achieve great results. Here’s a quick snapshot of the process:
- Bake two layers of cake.
- Cool them down completely.
- Layer with ice cream.
- Frost with whipped topping.
- Freeze the whole thing and serve!
{image_template}
What You’ll Need
To create this unforgettable cake, gather the following ingredients:
- 1 box of cake mix (your choice, preferably vanilla)
- 1/2 cup of vegetable oil
- 3 large eggs
- 1/2 cup of milk
- 1 quart of your dad’s favorite ice cream flavor
- 1 container of whipped topping
- Chocolate syrup or additional toppings for decoration (optional)
If you’re in the mood for a little twist, feel free to substitute different cake mixes or ice cream flavors—think chocolate cake with mint ice cream!

Directions to Follow
Let’s dive into the steps to create this delicious Birthday Ice Cream Cake!
- Preheat your oven to 350°F (175°C). Prepare two 9-inch round cake pans with baking spray or line with parchment paper.
- In a mixing bowl, combine the cake mix, vegetable oil, eggs, and milk. Blend until the mixture is smooth and well combined.
- Divide the batter evenly between the two prepared cake pans. Bake according to the package instructions, usually around 25-30 minutes. Check for doneness with a toothpick—if it comes out clean, it’s ready!
- Once baked, remove the cakes from the oven and allow them to cool in the pans for about 10 minutes. Then transfer them to wire racks to cool completely.
- Once the cakes have cooled, place one layer on a serving platter. Spread a layer of softened ice cream generously on top of the first cake layer.
- Add the second cake layer on top of the ice cream layer. Cover the entire cake with whipped topping, making it nice and smooth.
- For an optional touch, drizzle chocolate syrup or sprinkle with additional decorations as desired.
- Freeze the assembled cake for at least 2 hours before serving—it helps everything set beautifully.
- Slice, serve, and enjoy the deliciousness!
Best Ways to Enjoy It
To bring out the best in your Birthday Ice Cream Cake, consider serving it alongside fresh fruit, like strawberries or raspberries, for a refreshing contrast. You could also accentuate the chocolate drizzle with sprinkles or crushed nuts. For those who appreciate a little extra indulgence, serving it with a scoop of extra ice cream on the side is never a bad idea!
Keeping Leftovers Fresh
Once you’ve enjoyed your Birthday Ice Cream Cake, storing any leftovers is simple. Keep the cake covered in plastic wrap or a cake dome in the freezer. Since it’s primarily ice cream, you won’t need to worry about it lasting long, but it can be stored for up to a week in the freezer. Just be cautious about refreezing if it starts to melt; this will help maintain the texture.
Pro Chef Tips
Here are some chef secrets to elevate your Birthday Ice Cream Cake:
- Let the ice cream soften slightly before spreading it; this makes it easier to layer.
- Use different cake mixes for a unique flavor profile—red velvet with cream cheese ice cream can be a festive alternative!
- Make it a day ahead: This not only saves you time but allows the flavors to meld beautifully.
Creative Twists
Feel free to experiment with flavor combinations! Here are some fun ideas:
- Cookies and Cream Delight: Use chocolate cake and cookies and cream ice cream.
- Tropical Treat: Vanilla cake with coconut ice cream and topped with shredded coconut.
- Nutty Dream: Add peanut butter ice cream and top it off with crushed peanuts and caramel drizzle.
Your Questions Answered
How long does it take to prepare this cake?
The overall preparation time is about an hour, plus an additional 2 hours to freeze the cake.
Can I substitute the ice cream?
Absolutely! Use any flavor you prefer or even a dairy-free option.
Is it safe to refreeze once it has melted?
It’s best to avoid refreezing if it fully melts, as the texture can become grainy. Consider serving any melted portions immediately instead.
Get ready to impress your loved ones with this easy and scrumptious Birthday Ice Cream Cake. Not only is it fun to make, but it offers a delightful surprise that will keep everyone smiling all day long!