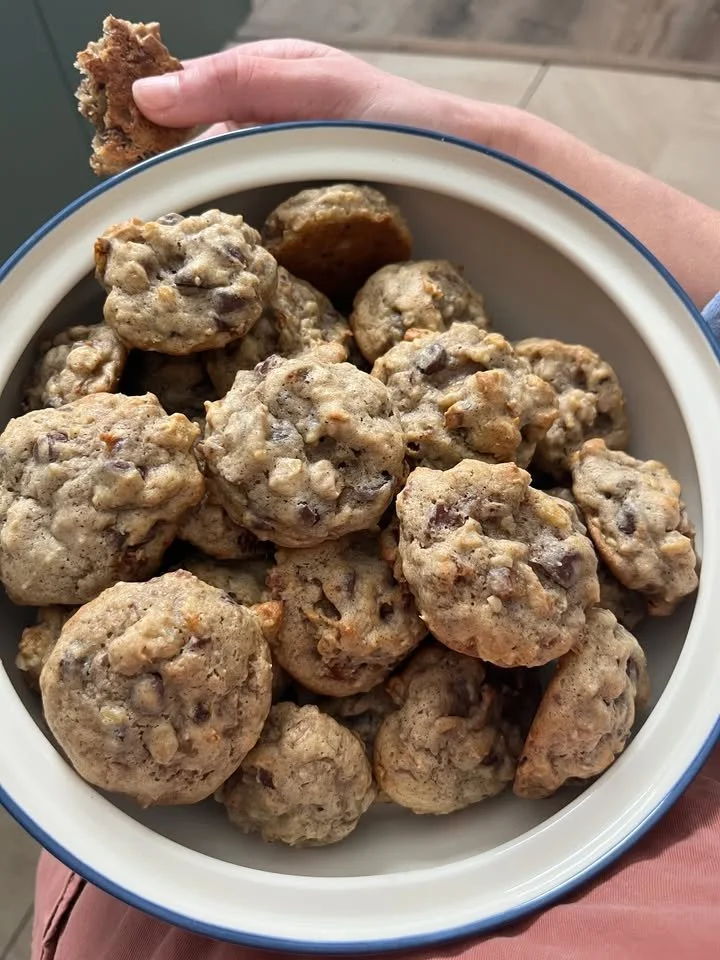
Vintage Cookies are the kind of sweet treat that take you right back to your childhood. Imagine a warm cookie, straight out of the oven, with melty chocolate chips and a buttery, delightful aroma wafting through your kitchen. Whenever I bake these cookies, I am reminded of the simple joys of family gatherings and cozy evenings at home. This classic cookie recipe is not only a hit among friends and family, but it’s also exceptionally easy to whip up, making it a perfect choice for any occasion.
What makes this recipe special
You might be wondering why you should try your hand at these Vintage Cookies. Well, here are a few compelling reasons. For one, this recipe doesn’t require any fancy ingredients—just staple pantry items and a bit of love. It’s versatile enough for casual weeknight dessert, but also fancy enough to impress guests at a holiday gathering. Plus, kids love these cookies, so they’re fantastic for baking activities with your little helpers!
"I made these Vintage Cookies for a bake sale, and they disappeared within minutes! Everyone loved them, and I got asked for the recipe multiple times. They’re definitely a new family favorite!" – Jenna M.
Preparing Vintage Cookies
Making Vintage Cookies is easy and straightforward, which makes it perfect for bakers of all skill levels. Here’s a quick overview: you’ll combine dry ingredients, cream the butters and sugars, then mix it all together with chocolate chips before baking. Before you know it, the aroma of freshly baked cookies will fill your home!
{image_template}
What you’ll need
When setting out to make Vintage Cookies, gather these key ingredients:
- 2 1/4 cups all-purpose flour
- 1 tsp baking soda
- 1/2 tsp salt
- 1 cup unsalted butter, softened
- 3/4 cup granulated sugar
- 3/4 cup brown sugar, packed
- 1 tsp vanilla extract
- 2 large eggs
- 2 cups chocolate chips
Note: You can substitute the chocolate chips with butterscotch or peanut butter chips if you’re looking for a little twist.

Step-by-step instructions
Here’s how to bring your Vintage Cookies to life:
- Preheat your oven to 350°F (175°C).
- In a bowl, whisk together the flour, baking soda, and salt.
- In another large bowl, cream together the softened butter, granulated sugar, and brown sugar until it’s smooth and creamy.
- Beat in the vanilla extract and eggs until everything is well combined.
- Gradually stir the dry mixture into the wet mixture until just blended.
- Gently fold in the chocolate chips until evenly dispersed.
- Use a rounded tablespoon to drop cookie dough onto ungreased baking sheets, spacing them a couple of inches apart.
- Bake in the preheated oven for 10-12 minutes, or until the edges are nicely golden.
- Let the cookies cool on the baking sheets for a few minutes before transferring them to wire racks to cool completely.

Best ways to enjoy it
When it comes to serving Vintage Cookies, the options are endless! They pair beautifully with a glass of cold milk or a steaming cup of coffee. For a fun twist, try sandwiching two cookies with vanilla ice cream for a decadent dessert or serve them on a platter with fresh fruit for a delightful balance of flavors and textures.
Storage and reheating tips
To keep your Vintage Cookies fresh, store them in an airtight container at room temperature. They’ll last about a week, but I assure you, they might not last that long! If you prefer, you can also freeze the cookies for up to three months—just make sure to layer them between parchment paper and use a freezer-safe container. When ready to enjoy, let them thaw at room temperature or pop them in the microwave for a few seconds to restore that fresh-baked warmth.
Pro chef tips
Here are a few helpful tips to ensure your Vintage Cookies come out perfect:
- Make sure your butter is softened but not melted for the right texture.
- Do not overmix the dough after adding the dry ingredients, as this can result in tough cookies.
- For an extra touch, sprinkle a small pinch of sea salt on top of each cookie before baking for a sweet and salty flavor contrast.
Creative twists
Feeling adventurous? Here are some fun variations you can try:
- Substitute the chocolate chips with white chocolate or a mix of different kinds for a beautiful color contrast.
- Add in nuts, like walnuts or pecans, for a bit of crunch.
- For a seasonal twist, mix in dried fruits such as cranberries or raisins during the holidays.
Your questions answered
What’s the prep time for Vintage Cookies?
The prep time is about 15 minutes, and baking takes around 10-12 minutes, making this a quick baking project!
Can I use dairy-free butter?
Absolutely! You can substitute unsalted butter with a dairy-free alternative to make these cookies vegan-friendly.
How can I ensure my cookies are chewy?
For chewier cookies, remove them from the oven when the edges are golden, but the centers still look a bit underbaked; they’ll continue to firm up as they cool.
Now that you have all the details, it’s time to gather your ingredients and start baking your own batch of Vintage Cookies! Enjoy the process, savor the flavors, and make some delicious memories along the way.