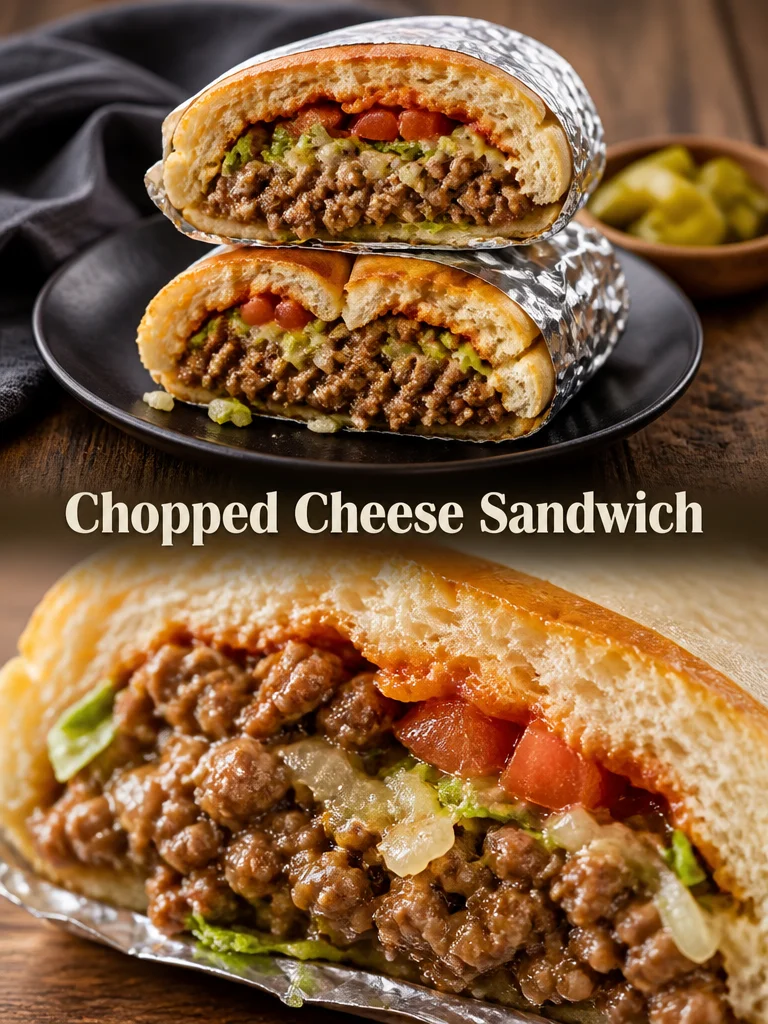
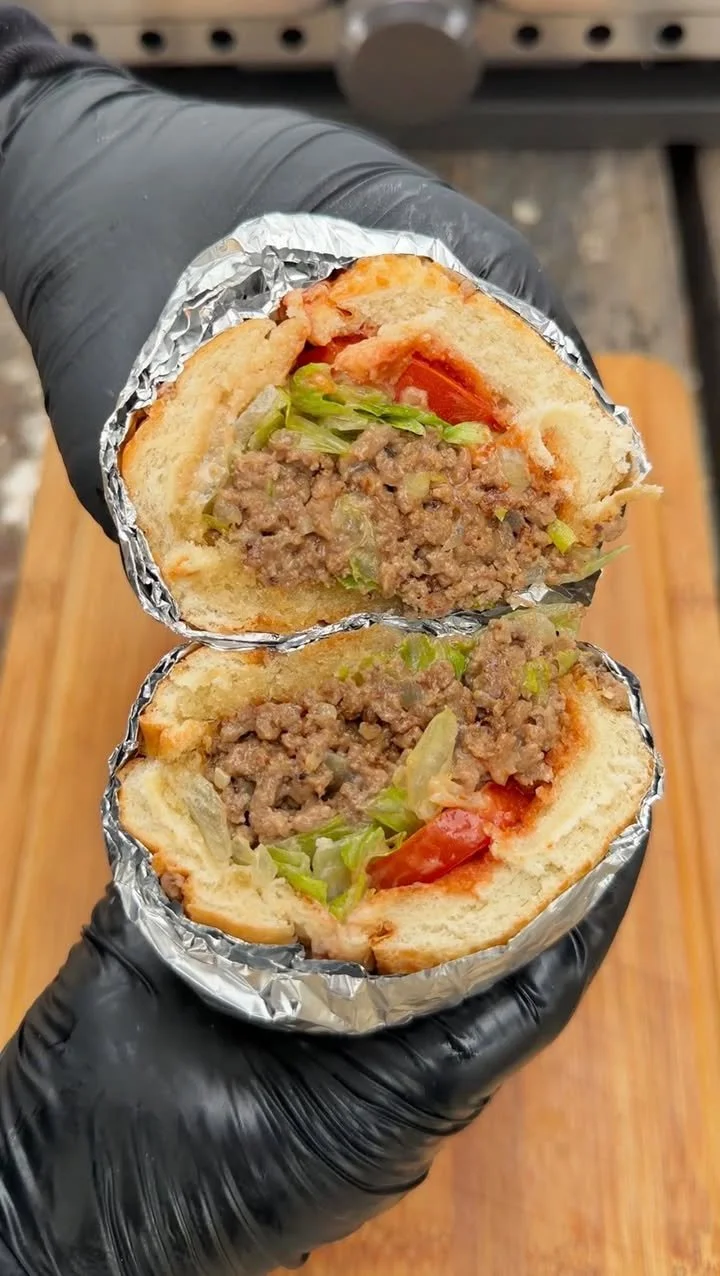
I remember the first time I made a chopped cheese sandwich at home — it felt like a tiny bodega victory. Simple ingredients, fast cooking, and that melty, savory payoff make this a go-to when you want something satisfying without fuss. At its core it’s browned ground beef mixed with sautéed onions and peppers, finished with gooey cheddar and piled onto your favorite bread with ketchup and mustard. It’s perfect for weeknights, hungry teens, or anyone craving a no-frills, comforting sandwich.
Why you’ll love this dish
This sandwich hits a lot of sweet spots: it’s fast, budget-friendly, and wildly adaptable. Ground beef cooks quickly and stretches well, the vegetables add brightness and texture, and melting cheddar makes every bite cozy. Make it for a quick family dinner, late-night snack, or assembly-line lunch. It’s especially handy when you want something more exciting than a burger but still easy enough to pull together between errands.
“One bite and you get charred beef, soft onions, and cheese that pulls — all in under 15 minutes. A neighborhood classic I make weekly.” — A quick review from a satisfied sandwich lover
Step-by-step overview
You’ll brown the beef, soften diced onions and green peppers in the same pan, season, and fold in shredded cheddar until it becomes a melty, cohesive filling. Then spoon it onto toasted or soft bread and top with ketchup and mustard. The whole process is a single-skillet job and takes about 15–20 minutes from stove to table.
{image_template}
What you’ll need
- Ground beef (about 1 lb — 80/20 for flavor; use 90/10 if you prefer leaner)
- Cheddar cheese (1 to 1½ cups shredded; sharp or mild to taste)
- Onions (1 medium, diced; yellow or white)
- Green peppers (1 medium, diced; bell or cubanelle)
- Bread of choice (hero/hoagie roll, sandwich bread, or kaiser rolls)
- Salt (½–1 tsp, to taste)
- Black pepper (¼–½ tsp, freshly ground)
- Ketchup (to taste)
- Mustard (to taste; yellow, Dijon, or brown)
Notes/substitutions:
- Swap cheddar for American, Monterrey Jack, or provolone for different meltiness and flavor.
- For a healthier spin, use ground turkey or a plant-based beef alternative.
- Add pickles, hot sauce, or chopped tomatoes as optional toppings.
{image_2}
Directions to follow
- Heat a large skillet over medium heat. Add the ground beef and break it up with a spatula. Cook until browned and no pink remains (about 6–8 minutes).
- Add the diced onions and green peppers to the skillet. Sauté with the beef until the vegetables are softened and slightly translucent, about 4–5 minutes.
- Season the mixture with salt and freshly ground black pepper. Taste and adjust seasoning.
- Sprinkle the shredded cheddar evenly over the beef mixture. Cover the skillet briefly (30–60 seconds) to help the cheese melt. Use a spatula to chop and fold the cheese into the meat so it becomes fully incorporated and slightly creamy.
- Toast or warm your bread if desired. Spoon the cheesy beef mixture onto the bread. Add ketchup and mustard to taste.
- Serve immediately while the filling is hot and the cheese is gooey.
{image_1}
Best ways to enjoy it
- Serve with classic sides: crinkle-cut fries, potato chips, or a simple green salad.
- Add a crunchy element: dill pickles, pickled peppers, or raw red onion slices.
- For a heartier meal, pair with coleslaw or a tomato-cucumber salad.
- Drinks: a cold beer, an iced tea, or a fizzy soda complement the rich, savory flavors.
Storage and reheating tips
- Refrigerate leftovers within 2 hours of cooking. Store the filling in an airtight container for up to 3–4 days.
- Freeze the cooked filling in a freezer-safe container or bag for up to 2–3 months. Thaw overnight in the fridge before reheating.
- Reheat on the stovetop over medium heat to preserve texture. Add a splash of water to loosen if the mixture is dry. Microwave works in a pinch but can make bread soggy — reheat filling separately and assemble fresh bread.
- For best safety, always reheat leftovers to 165°F (74°C).
Pro chef tips
- Use a hot pan and don’t overcrowd; good contact helps develop a bit of browning on the beef for extra flavor.
- Keep a little fat in the pan (80/20 ground beef) — it carries flavor and helps the vegetables caramelize. If using lean beef, add 1 tbsp olive oil.
- Shred your own cheese from a block for better melting and no anti-caking agents.
- Press and chop: use the flat of your spatula to break the beef into small pieces and mix the cheese in — that “chopped” texture is part of the charm.
- Toast rolls cut-side down in the same skillet briefly to pick up browned bits for extra flavor.
Creative twists
- Spicy chopped cheese: add sliced jalapeños, a pinch of cayenne, or a dash of hot sauce.
- Mediterranean twist: swap cheddar for halloumi or feta and add chopped tomatoes and oregano.
- Vegetarian version: use crumbled tempeh or textured vegetable protein (TVP) seasoned with soy sauce and smoked paprika.
- Mexican-style: add cumin, chili powder, and top with guacamole and cilantro.
- Deluxe: fold in caramelized onions, mushrooms, or crispy bacon for depth.
Your questions answered
Q: How long does this take to make?
A: About 15–20 minutes from start to finish if your ingredients are prepped. Browning the beef and softening the veggies are the longest steps.
Q: Can I make the filling ahead and assemble sandwiches later?
A: Yes. Store the filling in the fridge for up to 3–4 days. Reheat on the stovetop and assemble on fresh bread to avoid sogginess.
Q: Is it safe to eat ground beef cooked this way?
A: Yes — cook ground beef until there is no pink and it reaches 160°F (71°C). Use a meat thermometer if unsure.
Q: What bread is best?
A: A sturdy roll (hoagie, hero, kaiser) holds up well. Soft sandwich bread works for a lighter bite, but toasting helps prevent sogginess.
Q: Can I use lean ground beef?
A: You can, but lean beef produces less fat and less flavor. Add a tablespoon of oil or a small pat of butter to the pan for flavor and to help the vegetables cook.
If you want, I can format this into a printable recipe card with estimated quantities and timings, or suggest a grocery list for one, two, or four servings. Which would help you most?