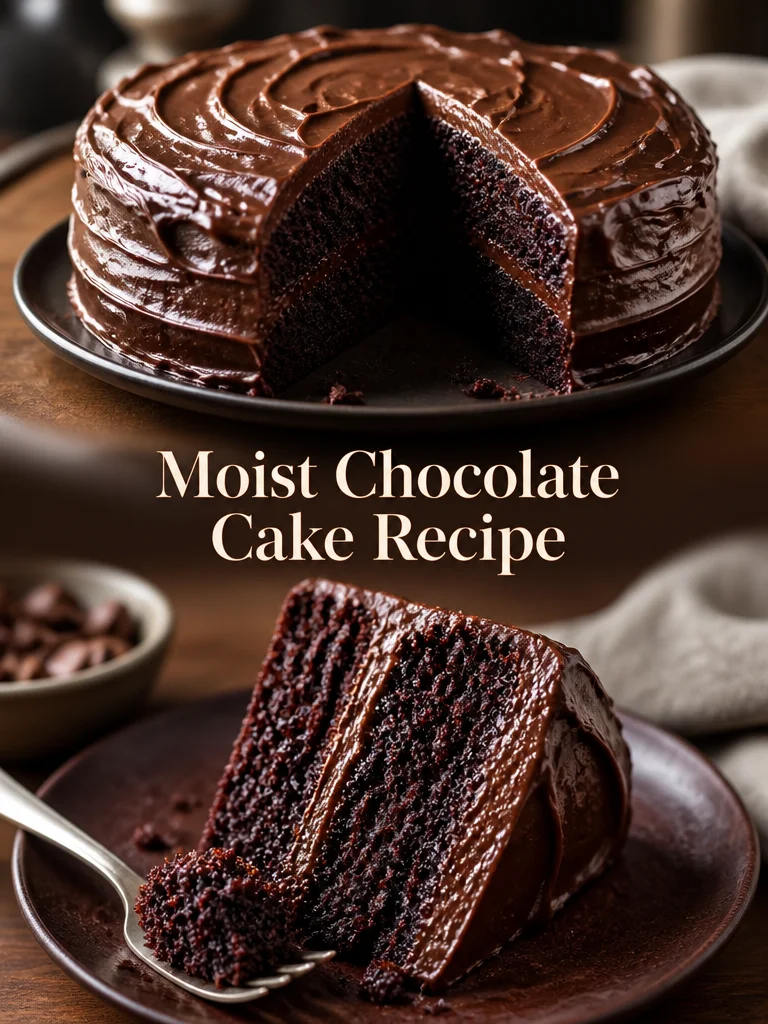
I still remember the first time I baked this moist chocolate cake — the batter smelled like a cozy café, and the crumb stayed tender even after a few days. It’s an unfussy, reliably rich layer cake that works for birthdays, weeknight dessert emergencies, and anyone who prefers a dense, velvety chocolate slice over a light sponge. Simple pantry ingredients, a splash of hot water or coffee to bloom the cocoa, and you’ve got a go-to chocolate cake that stays wonderfully moist.
Why you’ll love this dish
This recipe nails what most home bakers want: deep chocolate flavor, easy method, and a tender, moist crumb without complicated steps or expensive gadgets. It’s forgiving (the batter is meant to be loose), fast to mix, and uses oil instead of butter so the cake keeps soft for days. Use hot coffee to boost the chocolate note, or plain hot water when you want a neutral, kid-friendly cake.
“Creamy, not-too-sweet, and reliably moist — my family asked for this every weekend after the first bake.” — a reader review
This cake is perfect for:
- Casual celebrations and potlucks (two 8-inch layers are easy to transport).
- Busy weeknights when you want a homemade dessert without fuss.
- Bakers who want a base cake to dress up — frost, ganache, fruit, or leave plain.
How this recipe comes together
Step-by-step overview:
- Combine the dry ingredients so everything rises evenly.
- Whisk in eggs, milk, oil, and vanilla for a smooth, well-emulsified batter.
- Add hot water or hot coffee to bloom the cocoa — this loosens the batter and magnifies chocolate flavor.
- Pour into prepared pans and bake until set and a toothpick comes out clean.
- Cool completely, then assemble with an optional chocolate cream (simple hot cream + chocolate ganache).
This gives you two 8-inch cake layers ready for stacking and decorating.
{image_template}
What you’ll need
- 2 cups (240 g) all-purpose flour
- 3/4 cup (75 g) unsweetened cocoa powder (sift if lumpy)
- 2 cups (400 g) granulated sugar
- 2 teaspoons baking powder
- 1 teaspoon baking soda
- 1 teaspoon salt
- 2 large eggs (room temperature recommended)
- 1 cup (240 ml) milk (see substitutions)
- 1/2 cup (120 ml) vegetable oil (neutral oil like canola or sunflower)
- 2 teaspoons vanilla extract
- 1 cup (240 ml) hot water or hot coffee (coffee = stronger chocolate flavor)
Optional for chocolate cream/ganache:
- 200 ml cream (double or whipping cream)
- 150 g dark chocolate, chopped (use dairy-free chocolate to make vegan)
- 1 tablespoon butter (optional — adds sheen and richness)
Ingredient notes/substitutions:
- Milk: swap for buttermilk (or make sour milk by adding 1 tbsp vinegar to 1 cup milk and letting sit 5 minutes) for extra tenderness.
- Oil: melted coconut oil or light olive oil can work; flavor changes slightly.
- Cocoa: Dutch-processed cocoa will deepen flavor but may need a pinch more baking soda if using exclusively.
- Coffee: use strong brewed coffee or instant espresso dissolved in hot water for an intense chocolate note.
Directions to follow
- Preheat the oven to 340°F (170°C). Grease and flour two 8-inch (20 cm) cake pans or line them with parchment rounds.
- In a large bowl, whisk together the flour, cocoa powder, sugar, baking powder, baking soda, and salt until evenly combined.
- Add the eggs, milk, vegetable oil, and vanilla. Whisk until the batter is smooth and homogenous. A few small lumps are fine.
- Carefully stir in the hot water or hot coffee. The batter will be thin — that’s normal and helps produce a moist crumb.
- Divide the batter evenly between the prepared pans. Tap the pans once on the counter to remove large air bubbles.
- Bake for 30–35 minutes, rotating halfway if your oven runs hot. The cake is done when a toothpick inserted in the center comes out clean or with a few moist crumbs (not wet batter).
- Let the cakes cool in the pans for 10–15 minutes, then turn out onto a wire rack to cool completely before slicing or frosting.
Optional chocolate cream (quick ganache-style):
- Heat 200 ml cream in a small saucepan until it’s hot and steaming but not boiling.
- Place 150 g chopped dark chocolate in a bowl and pour the hot cream over it. Let sit 1–2 minutes, then stir until smooth.
- Stir in 1 tablespoon butter for a glossy finish, if using. Allow the mixture to cool and thicken until spreadable (or chill briefly for faster thickening).
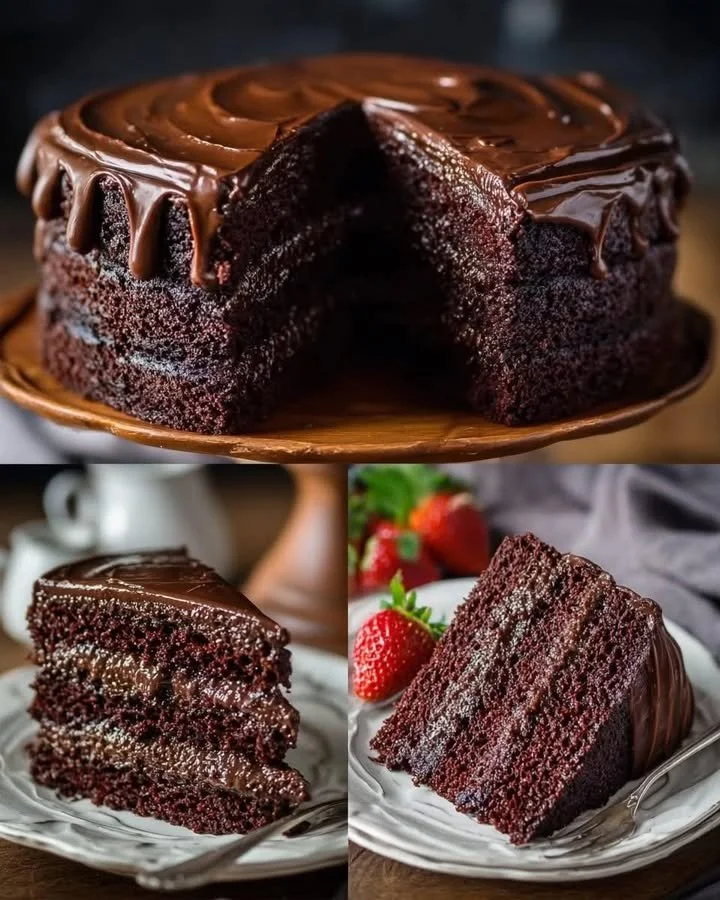
Assembly:
- If you want thinner layers, carefully slice each cooled cake horizontally with a serrated knife to make four thinner layers. Spread a layer of chocolate cream between layers and cover the top. Garnish with chocolate sauce, fresh berries, or a dusting of cocoa.
Best ways to enjoy it
- Serve slightly warm with a scoop of vanilla ice cream and a drizzle of chocolate sauce for a classic pairing.
- Plate a slice with fresh berries (strawberries, raspberries) to cut richness and add brightness.
- For coffee time, enjoy with an espresso or a cappuccino — the coffee complements the chocolate.
- For formal plating, pipe a ring of ganache around the slice and finish with toasted nuts or chocolate shavings.
How to store & freeze
- Unfrosted layers: wrap tightly in plastic wrap and store at room temperature for up to 2 days. For longer, refrigerate (keeps 4–5 days) but bring to room temp before serving for best texture.
- Assembled/frosted cake with cream: refrigerate and consume within 3–4 days. Keep covered to prevent drying and odor absorption.
- Freezing: wrap individual unfrosted layers tightly in plastic and aluminum foil and freeze up to 3 months. Thaw overnight in the fridge, then bring to room temperature before frosting. Fat-based frostings freeze better than cream-based ones — if you plan to freeze, use buttercream or ganache rather than fresh whipped cream.
Safety note: if you use the cream-based filling, always keep the finished cake refrigerated and discard leftovers after 3–4 days.
Helpful cooking tips
- Bring eggs and milk to room temperature before mixing — they incorporate more evenly and give a lighter texture.
- Sift the cocoa if it’s clumpy; it mixes better with dry ingredients and avoids streaks.
- Don’t overmix once you add the dry ingredients; mix until combined to keep the cake tender.
- Use hot coffee (cooled slightly) instead of water for a deeper chocolate flavor. Even instant espresso helps.
- Check your oven temperature with an oven thermometer — some ovens run hotter or cooler, and sugar-heavy cakes can darken quickly.
- Let cakes cool completely before slicing or filling. Chilling slightly (15–30 minutes) makes clean horizontal cuts easier.
- If you want extra moistness, brush each layer with a simple syrup (equal parts sugar and water, boiled and cooled) before frosting.
Creative twists
- Salted caramel chocolate cake: add a thin layer of salted caramel between layers and sprinkle flaky sea salt on top.
- Nutty crunch: fold toasted chopped hazelnuts or walnuts into the ganache or sprinkle between layers for texture.
- Vegan/dairy-free: use plant milk, dairy-free chocolate, and a vegan cream alternative for the ganache; use a flax egg (1 tbsp flax + 2.5 tbsp water per egg) as an egg substitute.
- Gluten-free: swap the flour for a 1:1 gluten-free baking flour blend and add an extra 1/4 tsp xanthan gum if your blend has none.
- Coffee-chocolate torte: replace hot water with strong coffee and add 1 tsp instant espresso to the dry mix for an intense mocha flavor.
Common questions
Q: How long does this cake take from start to finish?
A: Active prep is about 15–20 minutes. Baking takes 30–35 minutes, plus 30–60 minutes cooling time. Plan roughly 1.5–2 hours total if you include assembly and chilling time for the ganache.
Q: Can I use hot water instead of coffee?
A: Yes. Hot water hydrates cocoa and thins the batter. Using hot coffee intensifies the chocolate flavor, but plain hot water keeps it milder and kid-friendly.
Q: My cake came out dense — what went wrong?
A: Common causes: overmixing after adding dry ingredients (develops gluten), expired leavening (baking powder/soda), incorrect oven temperature, or using cold eggs/milk. Make sure leaveners are fresh and mix just until combined.
Q: Can I make this in one 9×13 pan instead of two 8-inch pans?
A: Yes. Bake time will change — expect 35–45 minutes. Start checking at 30 minutes and watch for the toothpick test. The cake will be a single thicker sheet rather than layers.
Q: Is the batter supposed to be runny?
A: Yes — with the hot water/coffee added the batter will be quite thin. That’s normal and gives the cake its moist texture.
Q: How do I get clean layer cuts?
A: Chill the cooled layers for 20–30 minutes, then use a long serrated knife and a gentle sawing motion. You can also use dental floss (unflavored) for very precise horizontal slicing.
If you want, I can adapt this into a printable card-style recipe, a gluten-free version, or a step-by-step photo tutorial for WordPress. Which would help most?