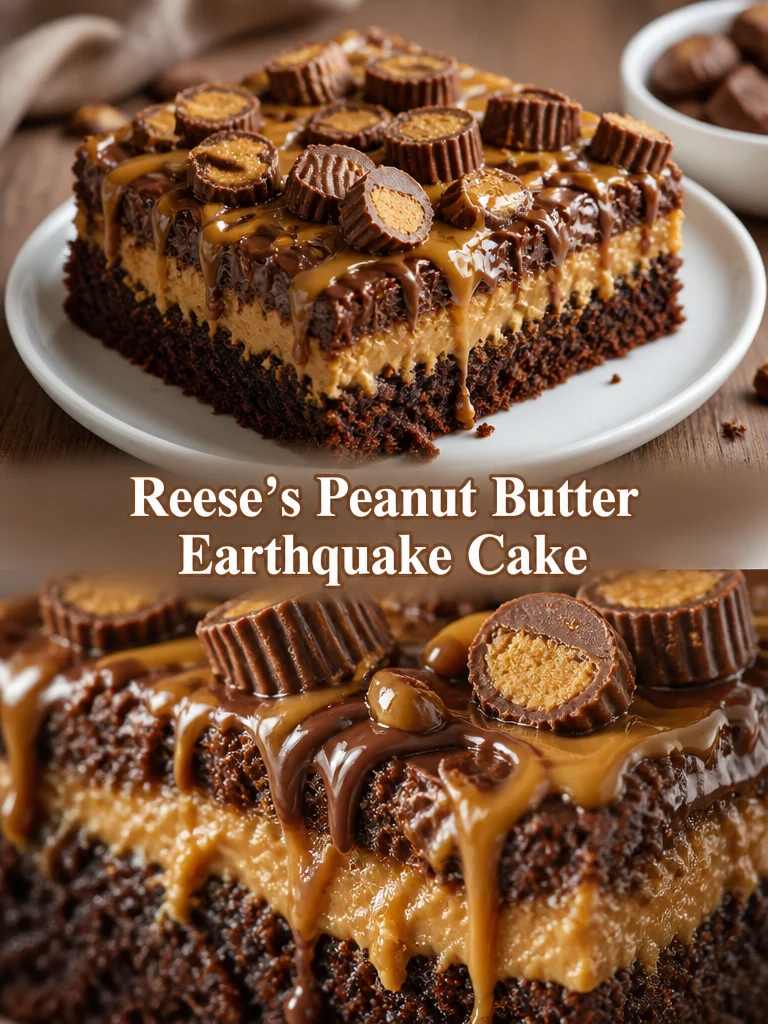
I remember the first time I made this Reese’s Peanut Butter Earthquake Cake: the kitchen filled with warm chocolate aroma, and everyone gathered before the pan even cooled. It’s a simple, over-the-top mashup of boxed chocolate cake, a silky peanut butter swirl, melty chocolate chips, and chopped Reese’s pieces that give every bite a little crunch. Perfect for potlucks, birthdays, or a weekend treat when you want something nostalgic and effortless.
What makes this recipe special
This cake hits a few sweet spots at once: it’s quick because you start with a box mix, indulgent thanks to the peanut butter swirl and chopped Reese’s, and very forgiving — great if you’re baking with kids or short on time. The marbled “earthquake” effect makes each slice look bakery-made without the fuss.
“A show-stopping, no-fuss dessert — rich, gooey, and everyone asked for seconds.” — a happy potluck reviewer
This is ideal when you want chocolate and peanut butter in a hurry: holidays, casual dinners, bake sales, or when you want a comforting, crowd-pleasing dessert that travels well.
How this recipe comes together
You’ll make a straightforward chocolate cake batter, fold in chocolate chips, then dot it with a sweetened peanut butter mixture. A few gentle swirls create that marbled earthquake look. Top with chopped Reese’s and walnuts, bake until just set, cool, then slice. Total hands-on time is low — most of the clock time is baking — and cleanup is minimal.
Quick notes to set expectations:
- Pan: 9×13 inch; feeds about 12.
- Bake: about 30–35 minutes.
- Texture: moist chocolate cake with pockets of peanut butter and melty chocolate.
- Make-ahead: bakes well a day before serving; can be frozen (instructions below).
{image_template}
Gather these items
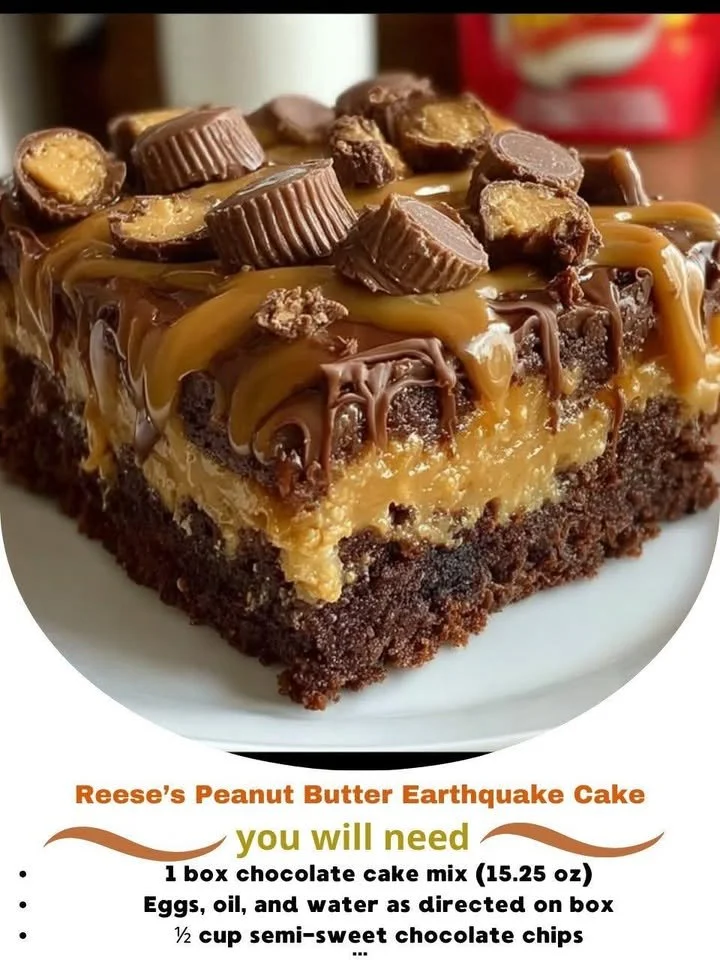
- 1 box chocolate cake mix (15.25 oz) — any brand; for gluten-free use a GF cake mix.
- Eggs, oil, and water as directed on the box.
- 1/2 cup semi-sweet chocolate chips — or use mini chips for more even distribution.
- 1 cup creamy peanut butter — smooth or creamy style; see substitutions below.
- 1 cup powdered (confectioners’) sugar — adds sweetness and structure to the peanut butter swirl.
- 1/2 cup milk — can swap for dairy-free milk (almond, oat) if needed.
- 1/2 cup chopped Reese’s Peanut Butter Cups — roughly chopped for texture.
- 1/2 cup chopped walnuts (optional) — omit for nut-free or swap for pecans.
Substitution notes inline:
- Natural peanut butter: use, but it’s runnier — add a couple extra tablespoons powdered sugar to thicken.
- Nut-free option: substitute SunButter (sunflower seed butter) and use allergen-free chocolate and cups.
- Vegan: use a vegan cake mix and replace eggs with flax eggs (1 tbsp ground flax + 3 tbsp water per egg), use dairy-free milk and dairy-free chocolate chips.
Step-by-step instructions
- Preheat the oven to 350°F (175°C). Grease and lightly flour a 9×13 inch pan, or line with parchment for easier removal.
- Make the cake batter according to the chocolate cake mix package. Add the eggs, oil, and water exactly as directed. Stir until combined.
- Fold in 1/2 cup semi-sweet chocolate chips so they’re evenly distributed.
- Pour the chocolate batter into the prepared pan and smooth the top with a spatula.
- In a medium bowl, whisk together 1 cup creamy peanut butter, 1 cup powdered sugar, and 1/2 cup milk until smooth. If the mixture is too thick to spoon, add a teaspoon of milk at a time; if too thin, add a little extra powdered sugar.
- Drop spoonfuls of the peanut butter mixture over the top of the chocolate batter. Use a knife to gently swirl the peanut butter into the batter in a marble pattern. Don’t over-swirl — you want visible ribbons.
- Sprinkle the top with 1/2 cup chopped Reese’s Peanut Butter Cups and the optional 1/2 cup chopped walnuts.
- Bake for 30–35 minutes. A toothpick inserted into the center should come out mostly clean; a small smear from melted chocolate or a touch of peanut butter is fine — the center should be set, not liquid.
- Let the cake cool in the pan on a wire rack for at least 20–30 minutes before slicing. Cooling further firms the peanut butter pockets and makes cleaner slices.
Best ways to enjoy it
- Serve warm with a scoop of vanilla ice cream or a dollop of whipped cream for contrast.
- Dust a little extra powdered sugar or drizzle melted chocolate across slices for a polished look.
- Cut into squares and serve at room temperature for bake sales or potlucks — they travel well.
- For a party platter, top each slice with a mini Reese’s half or a sprinkle of sea salt to accentuate the chocolate-peanut butter flavor.
Storage and reheating tips
- Room temp: Store covered at room temperature for 1–2 days in an airtight container or wrapped tightly.
- Refrigerator: Keep in the fridge up to 4–5 days. Wrap with plastic wrap or store in an airtight container to prevent drying.
- Freezing: Wrap the completely cooled cake tightly in plastic wrap and then foil. Freeze up to 3 months. Thaw overnight in the fridge or at room temperature for a few hours.
- Reheating: Microwave single slices for 10–20 seconds to warm through. For a fresher crust, reheat in a 300°F (150°C) oven for 5–8 minutes.
Food safety: cool the cake completely before long-term refrigeration or freezing to avoid condensation and sogginess. Discard leftovers kept at room temperature more than 2 hours.
Pro chef tips
- Use room-temperature peanut butter so it blends smoothly with the powdered sugar and milk.
- Sift the powdered sugar if you see lumps; this gives a silkier swirl.
- Drop the peanut butter mixture in dollops rather than spreading it — dollops create the most dramatic earthquake marbling when swirled.
- Don’t over-swirl. Too much swirling will blend the layers and lose the ripple effect.
- If your peanut butter is too runny, chill it 10–15 minutes or add a tablespoon or two more powdered sugar.
- Dark or glass pans change bake times. Start checking at 25 minutes in a dark pan.
- Let it cool — the peanut butter pockets firm as the cake cools, making cleaner slices.
Creative twists
- Caramel drizzle: add a salted caramel drizzle before serving for a salted-caramel peanut butter twist.
- White chocolate peanut butter: swap semi-sweet chips for white chocolate chips and top with peanut butter cups for a sweeter profile.
- Cupcake version: divide batter into a lined muffin tin and bake 18–22 minutes for portable mini “earthquakes.”
- Nut-free: use sunflower seed butter and allergy-safe chocolate/cups for classrooms or parties with nut restrictions.
- Double-decker: make two thinner layers, add a thick peanut butter frosting between them, and stack for a showier cake.
Your questions answered
Q: Can I use natural peanut butter?
A: Yes. Natural peanut butter is runnier, so thicken the swirl by adding a little extra powdered sugar (start with 2 tablespoons). Chill the mixture briefly if it’s too soft to dollop.
Q: How can I tell when the cake is done if the peanut butter swirl looks gooey?
A: Use a toothpick in the cake’s center. It should come out mostly clean or with moist crumbs. A tiny smear from melted peanut butter or chocolate is okay. The cake should spring back lightly when touched and the edges will start to pull away from the pan.
Q: Can I make this ahead or freeze it?
A: Yes. Bake and cool completely, then wrap tightly and freeze up to 3 months. Thaw overnight in the refrigerator. For best texture, serve within a few days after thawing.
Q: Is there a nut-free substitute for the peanut butter and Reese’s?
A: Use SunButter (sunflower seed butter) instead of peanut butter and opt for allergy-friendly chocolate cups. Flavor and color will be slightly different, but the texture and enjoyment remain.
Q: Can I make this with homemade cake batter instead of a box mix?
A: Absolutely. Use your favorite chocolate cake recipe and follow the same swirl and topping steps. Bake time may vary depending on batter density and pan type — check doneness with a toothpick.
If you want, I can also provide a printable card-style recipe or scale this up/down for a 9-inch round or cupcakes.