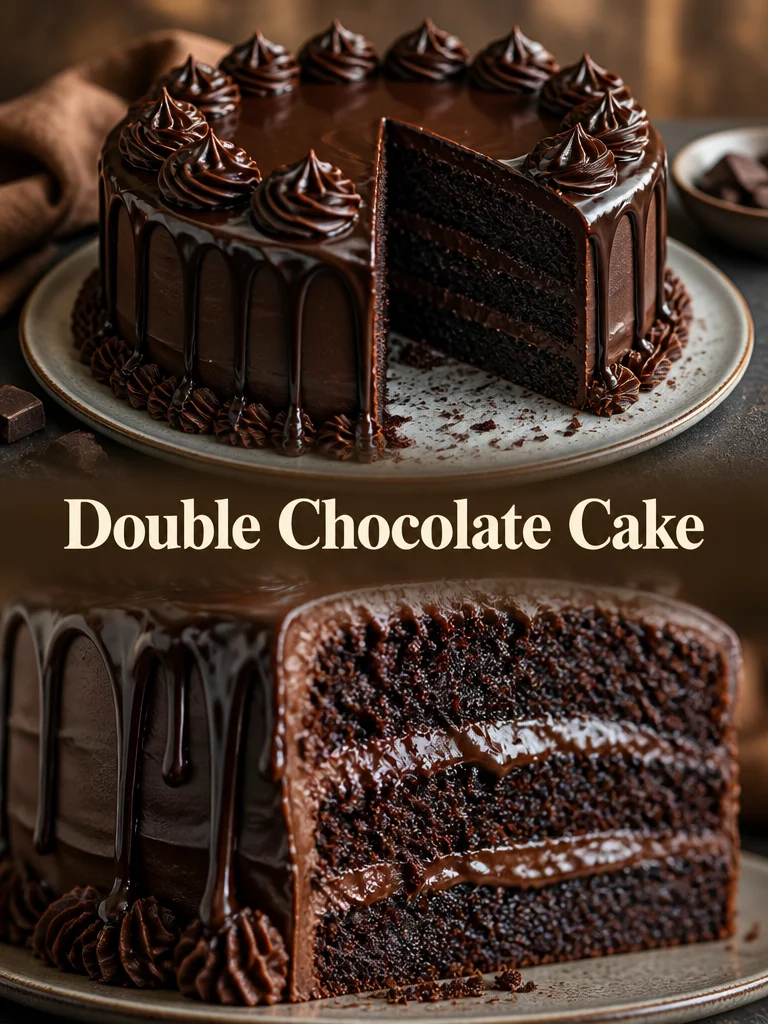
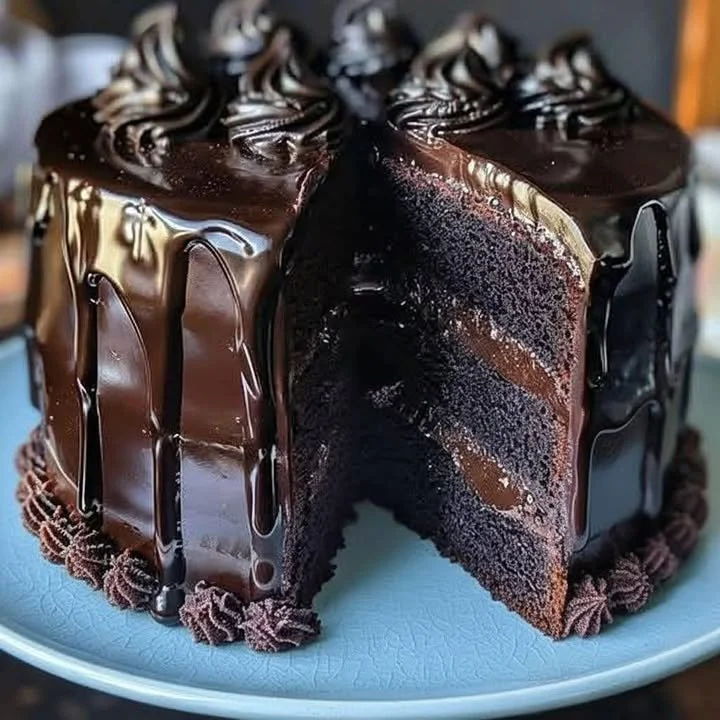
I still remember the first time I sliced into this triple-layer double chocolate cake: the crumb was tender, the crumb-to-icing ratio perfect, and the glossy "black velvet" frosting made every slice look like a party. This is a chocolate cake for when you want something rich and showy without needing tempering or complicated techniques. It uses pantry staples, a hit of hot coffee for depth, and a simple chocolate cream that becomes silky and spreadable once it cools.
What makes this recipe special
This double chocolate cake gives you deep chocolate flavor with a familiar, easy method. Three things set it apart:
- Two forms of chocolate: melted chocolate in the batter plus a dark chocolate cream for frosting gives layers of intensity.
- Hot coffee (or hot water) blooms the cocoa and thins the batter, producing a moist, tender crumb.
- A glossy “black velvet” icing (like a thick ganache sweetened and stabilized with butter and powdered sugar) that spreads smoothly and sets shiny.
Why people search for it: it’s a celebration cake that’s surprisingly approachable. You get restaurant-style chocolate without tempering or complicated piping.
“Dense but not heavy, with a glossy finish that makes it perfect for birthdays — rich, not cloying.” — A quick note from my kitchen testing
Step-by-step overview
This is the quick process so you know what you’re committing to:
- Preheat oven and prepare three 8–9 inch pans.
- Mix dry ingredients, whisk wet ingredients into them, add melted chocolate.
- Stir in hot coffee — the batter will loosen.
- Divide into three pans and bake until a toothpick comes out with a few moist crumbs.
- Cool completely.
- Make the chocolate cream (heat the cream, melt chocolate into it, add butter and powdered sugar).
- Assemble: layer, frost, smooth, and chill for at least 2 hours (overnight ideal).
{image_template}
What you’ll need
- 2½ cups all-purpose flour (swap: 1:1 gluten-free cup-for-cup blend)
- 1 cup unsweetened cocoa powder (preferably natural or Dutch-processed depending on your cocoa; Dutch gives darker color)
- 2½ cups granulated sugar
- 2 teaspoons baking soda
- 1 teaspoon baking powder
- 1 teaspoon salt
- 3 eggs, room temperature (helps emulsion and rise; cold eggs tighten batter)
- 1¼ cups milk (use full-fat for tenderness; swap: plant milk for dairy-free)
- ¾ cup vegetable oil (neutral oil keeps crumb moist; swap: melted coconut oil or light olive oil)
- 2 teaspoons vanilla extract
- 1 cup hot coffee (or hot water — coffee deepens chocolate flavor)
- 150 g dark chocolate, melted (folded into batter)
- For the icing: 200 g dark chocolate (at least 60% cocoa), chopped
- 200 ml cream (use dairy or full-fat plant cream for dairy-free versions)
- 100 g butter, room temperature (swap: vegan butter for dairy-free)
- 2 tablespoons cocoa powder (adds color and intensity to the icing)
- Powdered sugar — about 1 cup, added gradually to adjust consistency
- 1 teaspoon vanilla
- A pinch of salt
Notes: use good-quality dark chocolate for both batter and icing — it makes a noticeable difference. If using milk chocolate, reduce powdered sugar in the icing because milk chocolate is sweeter.
Step-by-step instructions
- Preheat and prep
- Preheat the oven to 340°F (170°C) with top and bottom heat. Place racks in the center third of the oven. Grease three 8–9 inch cake pans and line the bottoms with parchment if you like easy release.
- Combine dry ingredients
- In a large bowl whisk together the flour, cocoa powder, granulated sugar, baking soda, baking powder, and salt until evenly mixed.
- Add wet ingredients
- Add the eggs, milk, oil, and vanilla. Beat just until smooth and combined.
- Add melted chocolate
- Stir in the 150 g melted dark chocolate until incorporated.
- Add hot coffee
- Slowly pour in the hot coffee (or hot water) while stirring. The batter will be thin and loose — this is normal. The hot liquid helps bloom the cocoa and create moisture.
- Divide and bake
- Divide the batter evenly between the three prepared pans. Tip: weigh the batter or use a measuring cup to get equal amounts. Bake for 25–30 minutes. A toothpick should come out with a few moist crumbs, not wet batter.
- Cool layers
- Let the cakes cool in pans for 10–15 minutes. Run a knife around the edges and invert onto cooling racks. Cool completely before icing; warm cakes will melt the frosting.
- Make the icing (black velvet)
- Heat the 200 ml cream until steaming but not boiling. Place the chopped 200 g dark chocolate in a bowl and pour the hot cream over it. Let sit 1 minute, then stir until smooth to form a ganache.
- Add the room-temperature butter, 2 tablespoons cocoa, vanilla, and a pinch of salt. Mix until smooth.
- Gradually sift in powdered sugar, a little at a time, until you reach a spreadable, glossy cream. If it gets too stiff, loosen with a teaspoon of warm cream or milk.
- Let the icing cool and thicken slightly at room temperature until it’s spreadable.
- Assemble
- Place the first cake layer on a serving plate. Spread a generous layer of icing.
- Add the second layer and repeat. Place the third layer on top and frost the entire cake with the remaining icing.
- Use an offset spatula to smooth the surface for that shiny, black velvet finish. A light swirl or combed lines works too.
- Chill
- Refrigerate the finished cake for at least 2 hours to set the icing; overnight is best for slicing cleanly.
Tip: If you want very sharp edges, do a thin crumb coat first, chill 20–30 minutes, then do the final layer of icing.
Best ways to enjoy it
- Serve slightly chilled or at cool room temperature. Remove from fridge 30–60 minutes before serving for best flavor and texture.
- Pair with a shot of espresso, salted caramel sauce, or a scoop of vanilla bean ice cream.
- Fresh berries — raspberries or strawberries — cut through the richness.
- For a celebration, top with chocolate curls, toasted hazelnuts, or a dusting of cocoa.
- Single slices warm nicely in the microwave for 8–12 seconds if you prefer a gooier bite.
How to store & freeze
- Refrigerator: Store the frosted cake in an airtight cake box or covered with a cake dome. Keeps for 3–4 days. Because the frosting contains cream and butter, don’t leave slices at room temperature longer than 2 hours.
- Freezing layers: Wrap unfrosted layers tightly in plastic wrap and foil and freeze up to 2 months. Thaw in the fridge overnight before icing.
- Freezing a frosted cake: You can freeze a fully frosted cake (flash-freeze uncovered for 1–2 hours, then wrap well). Thaw in the fridge overnight to avoid condensation on the surface.
- Reheating: Bring slices to room temperature for 30–60 minutes. Warm a slice for a few seconds in the microwave if you want melty chocolate.
Food safety: because the icing has cream, keep refrigerated and discard any leftovers after 3–4 days.
Pro chef tips
- Room-temperature ingredients: eggs, milk, and butter emulsify better and give a lighter rise.
- Sift the cocoa and flour together to avoid lumps and ensure even distribution.
- Don’t overmix after adding the hot coffee — overworking can tighten the crumb. Mix until just combined.
- Divide batter by weight for perfectly even layers. A kitchen scale makes this foolproof.
- Rotate pans halfway if your oven has hot spots. Keep an eye on the center rack.
- If your icing becomes grainy or stiff, whisk in a splash of warm cream to smooth it out.
- For shinier icing, a touch of corn syrup or glucose (½–1 tsp) can add sheen, but it’s optional.
- If you prefer a slightly lighter frosting, fold whipped cream into cooled ganache to make a lighter mousse-style filling.
Creative twists
- Mocha: add 1–2 tablespoons instant espresso powder to the batter for an extra coffee hit.
- Raspberry ripple: spread a thin layer of raspberry jam between layers under the icing.
- Orange-chocolate: add 1–2 teaspoons orange zest to the batter and icing for a chocolate-orange cake.
- Nutty crunch: sandwich chopped toasted hazelnuts or praline between layers for texture.
- Vegan version: use aquafaba or a commercial egg replacer, plant milk and vegan butter, and a dairy-free dark chocolate. Adjust powdered sugar for structure.
- Cupcakes: bake in lined muffin tins for 18–22 minutes at the same temperature.
- Gluten-free: swap the flour for a 1:1 gluten-free blend and add ½ teaspoon xanthan gum if your blend lacks it.
Helpful answers
Q: How long does this cake take from start to finish?
A: Active prep is about 30–40 minutes (including icing prep). Bake and cool add ~1.5 hours, and chilling is at least 2 hours. Plan for about 4 hours total; overnight chilling yields the best slices.
Q: The batter was very runny — did I do something wrong?
A: No — the hot coffee plus melted chocolate makes the batter loose. It yields a moist, tender crumb. If you prefer a thicker batter, chill it briefly, but it’s not necessary.
Q: Can I use milk chocolate instead of dark chocolate?
A: Yes, but the cake will be sweeter and less intense. If using milk chocolate in the icing, reduce powdered sugar slightly and taste as you go.
Q: My icing is too thin. How do I thicken it?
A: Chill the icing briefly in the fridge and stir. If still thin, add a little more sifted powdered sugar. If it becomes too thick, loosen with a teaspoon of warm cream or milk.
Q: Can I make this ahead for a party?
A: Absolutely. Bake layers a day or two ahead, wrap and refrigerate. Make the icing the day of or the night before. Assemble and chill overnight for clean slices.
If you want, I can convert the ingredient list to grams for every item, give timings for 9-inch versus 8-inch pans, or produce a printable recipe card you can paste into WordPress. Which would help most?